Running Security Verification Tests on Your Azure Resources using Secure DevOps Kit for Azure (AzSK) and Azure DevOps

In a previous article, we were looking into how we can use Secure DevOps Kit for Azure to run security analysis on your Azure Resource Manager Templates. AzSK also provides a task to run security analysis on your Azure Resources. In this article, we will see how we can use it
If you remember the last article, we used a simple ASP.Net Core 2.2 MVC project and ARM Templates to deploy the application to automatically created/updated resources. We have a release pipeline that first deploys the ARM templates on top of a resource group on an Azure subscription and then deploys the web application into the deployed infrastructure. The release pipeline definition would look something like this.
When we have the Secure DevOps Kit for Azure Extension for Azure Pipelines installed on your Azure DevOps account, you have access to the AzSK Security Verification Tests task in your release pipelines. Let’s modify the release pipeline to use the task to analyze our Azure resources
Search for AzSK on the available pipeline tasks in your release pipeline and add the AzSK Security Verification Tests task into your release.
You can select the Azure Connection you want to use to connect to an Azure subscription. Then on the Select Parameter Set input, you can select either ResourceGroupName or TagNameValuePair as a value. You can select a resource group to run the analysis if you select ResourceGroupName (this is what we will do) or else you can use an Azure Resource Tag Name and a Value to select resources to analyze as well. We want to analyze the resources inside a resource group. So, we will select ResourceGroupName as the value for Select Parameter Set. Then we need to set the ResourceGroup Names. Here you can have multiple resource groups analyzed by giving the names of the resource groups as a comma (,) separated list. You also need to set the Subscription ID as well. In this example, this is done through a variable set in the release pipeline.
You have a few other options as well. If you select Send events to Log Analytics option, you can send the events generated by the task to Azure Log Analytics. To do this you need to set 2 variables on your release definition. You need to set LAWSId with the Log Analytics Workspace ID and LAWSSharedKey with the key to access the Log Analytics workspace.
By default, the task will show individual errors it finds as its own error message, you can enable Aggregate Control Status checkbox to aggregate the error messages into one task error in the task summary.
Once the release completed running, you can see the output of the task and that will include the error logs that are generated by the AzSK Security Verification Tests
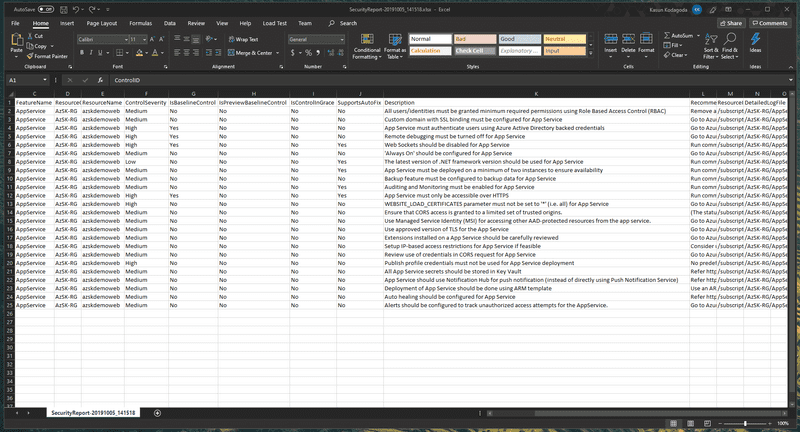
You can then download the release logs by clicking on Download all logs button and inside the .zip file, there is another .zip file that is containing a CSV file that has the security controls that were analyzed and the passed and failure states along with a description and a recommended fix.
Summary
In summary, in this article, we saw that you can use the AzSK Security Verification Task that comes as a part of Secure DevOps Kit for Azure to analyze Azure resources for security defects as part of your release pipelines. This takes on a shift-left approach when it comes to security and enables you to have feedback about the security of your Azure Resource early in the development.
You Might Also Like
← Previous Post
Next Post →


